overview
In brainstorming ideas for a new research company, given I needed to publish newsletters, request user sigb up to guage interest and publish potentially comoplicatted visuals, I decided I needed more control over the site formatting than basic services and wordpress templates offer. Not having a background in front-end dev work, this was a little out of my league, but what isnt when youre learning?
creating your project
- go to github and setup a repo
- clone your repo to your compute device, local or otherwise
git clone https://myrepo.url - setup a pipenv environment, if you do not already have one do
pip install pipenv - you can read more about pipenv here
- while i have had odd lag when installing packages, primary benefits of using this enironment manager (from the README):
- you no longer need to use pip and virtualenv separately. They work together.
- Managing a requirements.txt file can be problematic, so Pipenv uses the upcoming Pipfile and Pipfile.lock instead, which is superior for basic use cases.
- Hashes are used everywhere, always. Security. Automatically expose security vulnerabilities.
- Give you insight into your dependency graph (e.g. $ pipenv graph).
- Streamline development workflow by loading .env files.\
- while i have had odd lag when installing packages, primary benefits of using this enironment manager (from the README):
- cd to your project
- install django
pipenv install django - I like to install flake8 as well, but your linter selection is prefential
pipenv install flake8 --dev - the
--devwill install both the develop and default packages from the Pipfile
-
more on various commands in this really good pipenv writeup here
- now we can start our project; open your terminal and call django from inside your repos local location
django-admin startproject [project_name] - set up sqlite db
python manage.py migrateexpected output
Operations to perform: Apply all migrations: admin, auth, contenttypes, sessions Running migrations: Applying contenttypes.0001_initial... OK Applying auth.0001_initial... OK Applying admin.0001_initial... OK Applying admin.0002_logentry_remove_auto_add... OK Applying admin.0003_logentry_add_action_flag_choices... OK Applying contenttypes.0002_remove_content_type_name... OK Applying auth.0002_alter_permission_name_max_length... OK Applying auth.0003_alter_user_email_max_length... OK Applying auth.0004_alter_user_username_opts... OK Applying auth.0005_alter_user_last_login_null... OK Applying auth.0006_require_contenttypes_0002... OK Applying auth.0007_alter_validators_add_error_messages... OK Applying auth.0008_alter_user_username_max_length... OK Applying auth.0009_alter_user_last_name_max_length... OK Applying auth.0010_alter_group_name_max_length... OK Applying auth.0011_update_proxy_permissions... OK Applying sessions.0001_initial... OK - navigate to your project names directory; start your local server
python manage.py runserver - you should see a prompt mentioning the start of your development server at
http://127.0.0.1:8000/ - put this address in your browser to confirm successful run
- note: a db.sqlite file should have also been created as a result of your server starting
- note: an admin url will have been created by default; run
http://127.0.0.1:8000/adminto view
- note: when leaving / rejoining the project, you will need to reactivate your project from the command line. if you prefer to use the terminal in vs code, often it will remember the interpreter / environment last used; if you are starting from scratch (which I prefer to do as a mental check that reliability is where it should be) then you will need to run the following command after navigating to your project:
pipenv shell - application creation; djangoproject docs recommend creating these in the same location as your manage.py file; an application is a web app that does something
python manage.py startapp [app_name]modeling
An important step for formatting your database schema. may differ depending on your database of choice (e.g. mysql, postgres, sqlite, etc.). Three primary steps to remember:
- alter models.py
- run the following command to create migrations for those model changes
python manage.py makemigrations - run the following to apply those changes to the database
python manage.py migratecreating admins
django separates consumers, publishers (of content) and developers; to setup an admin user run the following; it will prompt you to create a user with credentials
python manage.py createsuperuser
design importing bootstrap templates
At this point, we are assuming you have a basic understanding of (1) applications, their purpose and how they relate to the site architecture, (2) views, (3) models and database management and (4) static files, their purpose, how they are organized and called upon. Now we can get to the fun stuff…
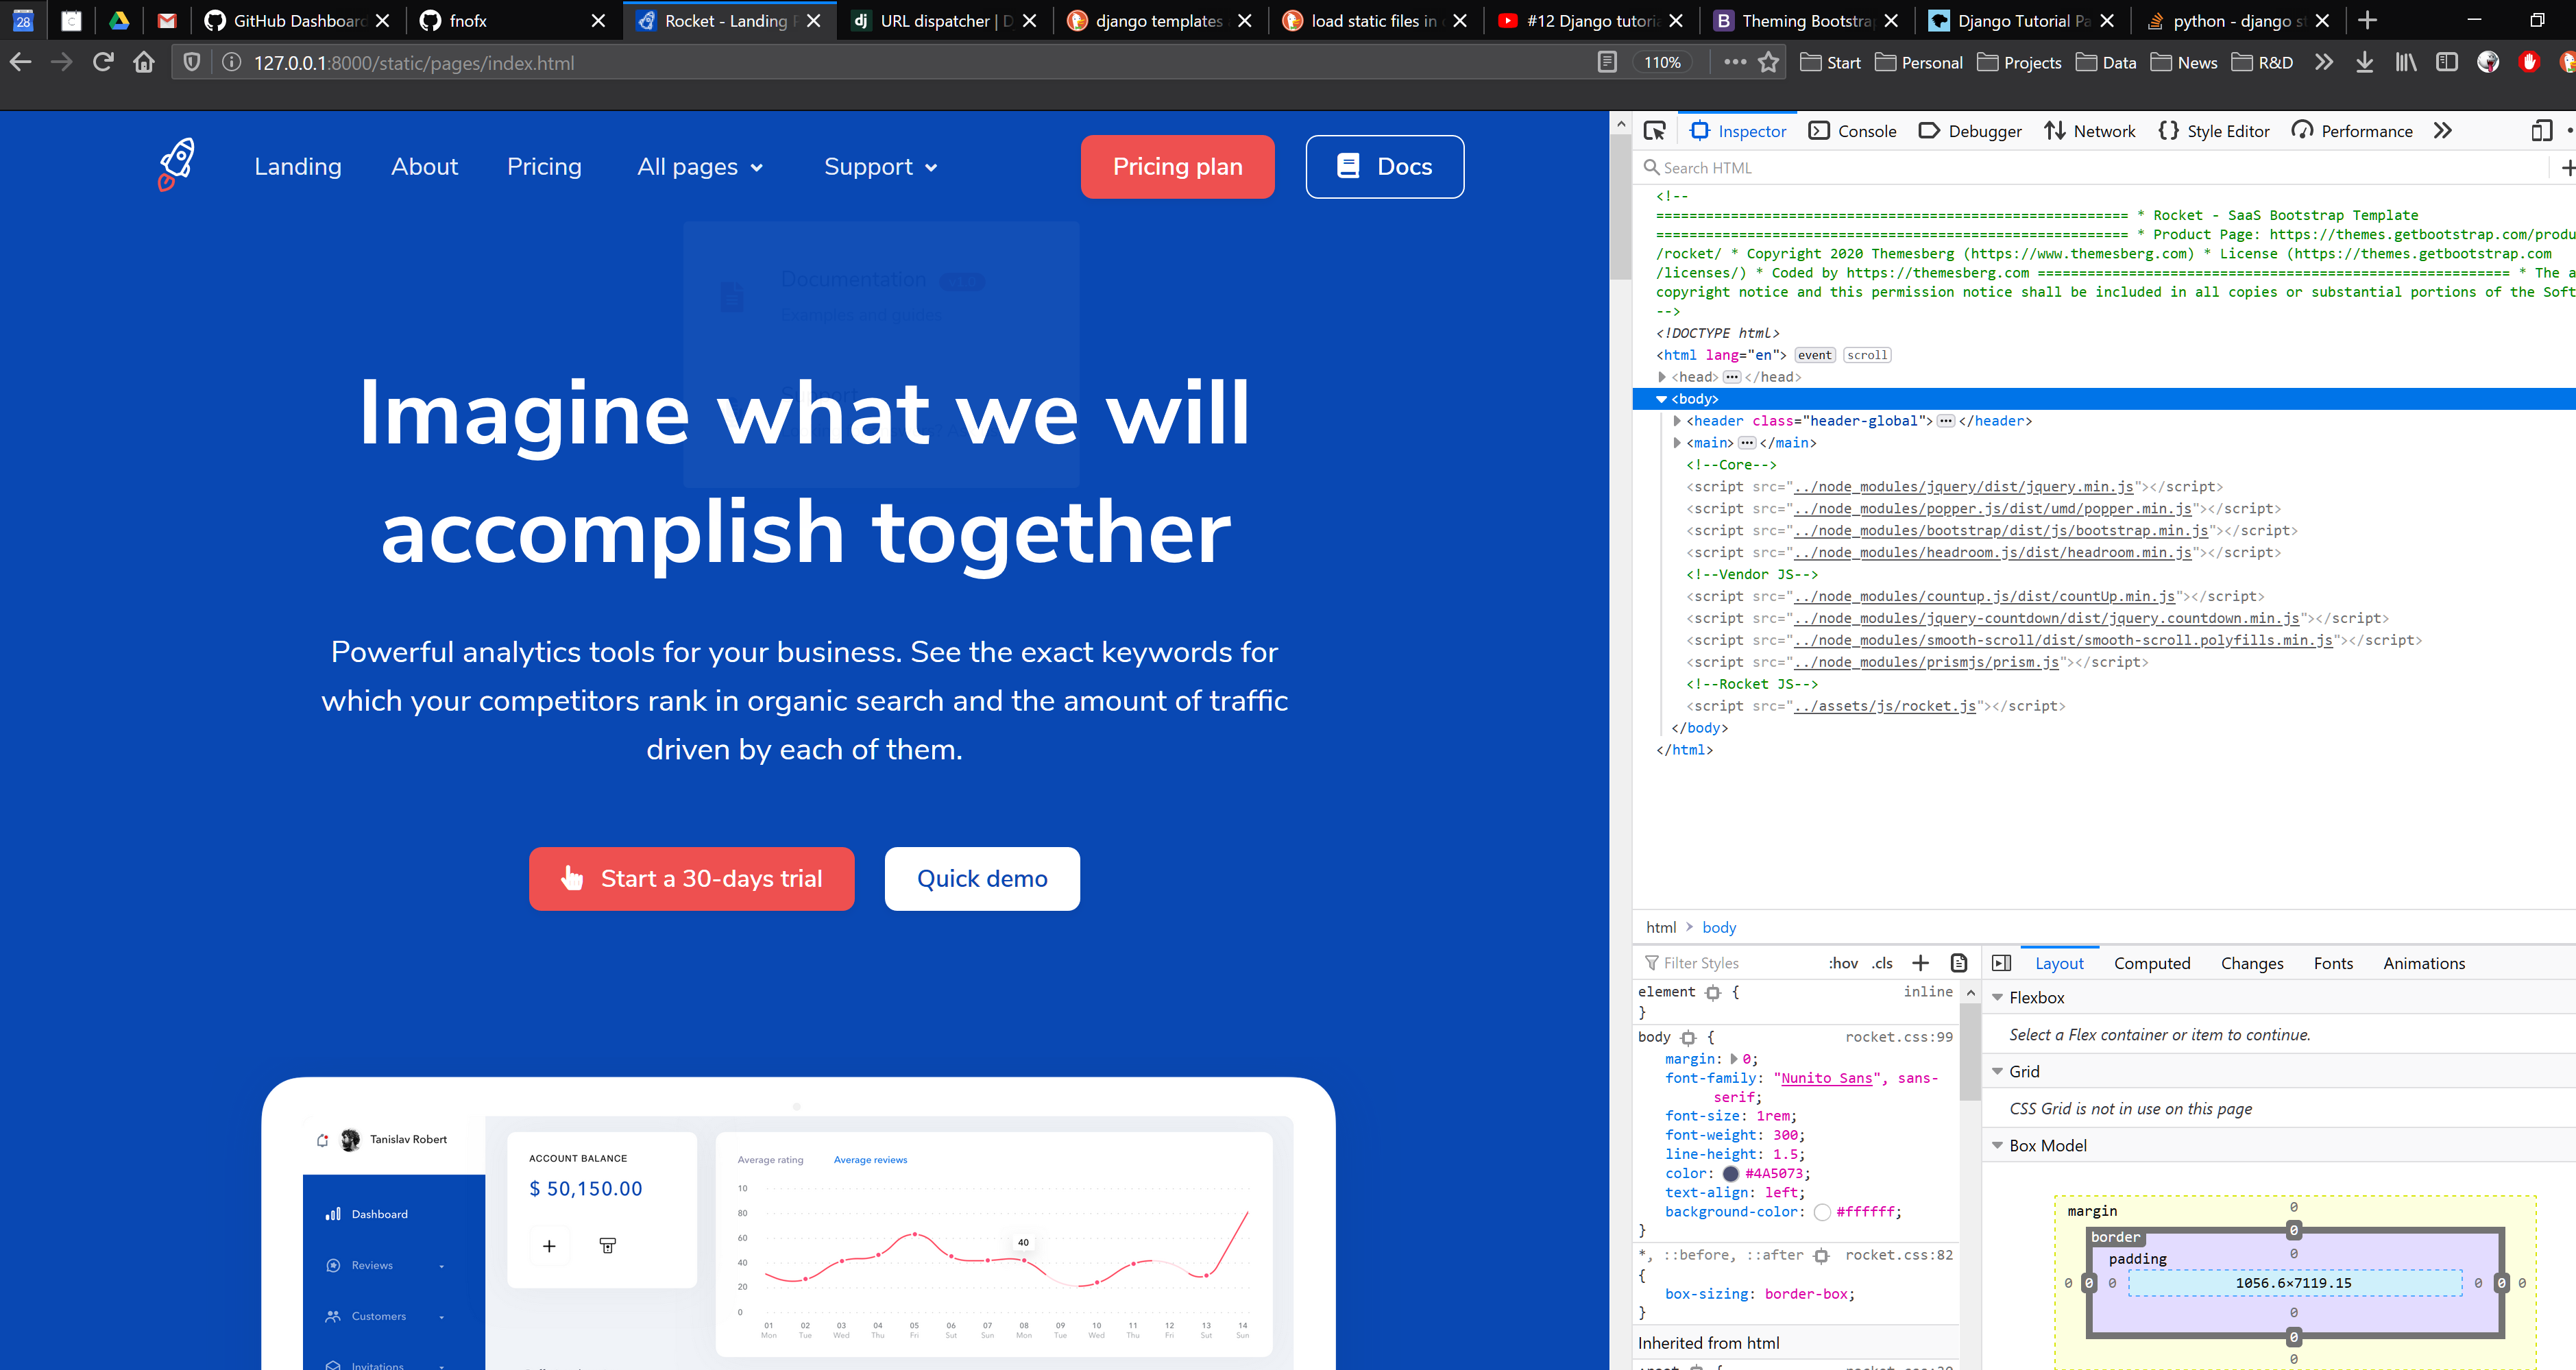
I am going to use the rocket theme from themeberg and they recommend using gulp. Given (1) this is a blog and (2) we want to get this up and running as quickly as possible (while learning about how it works) we are goingn to install the static files manually.
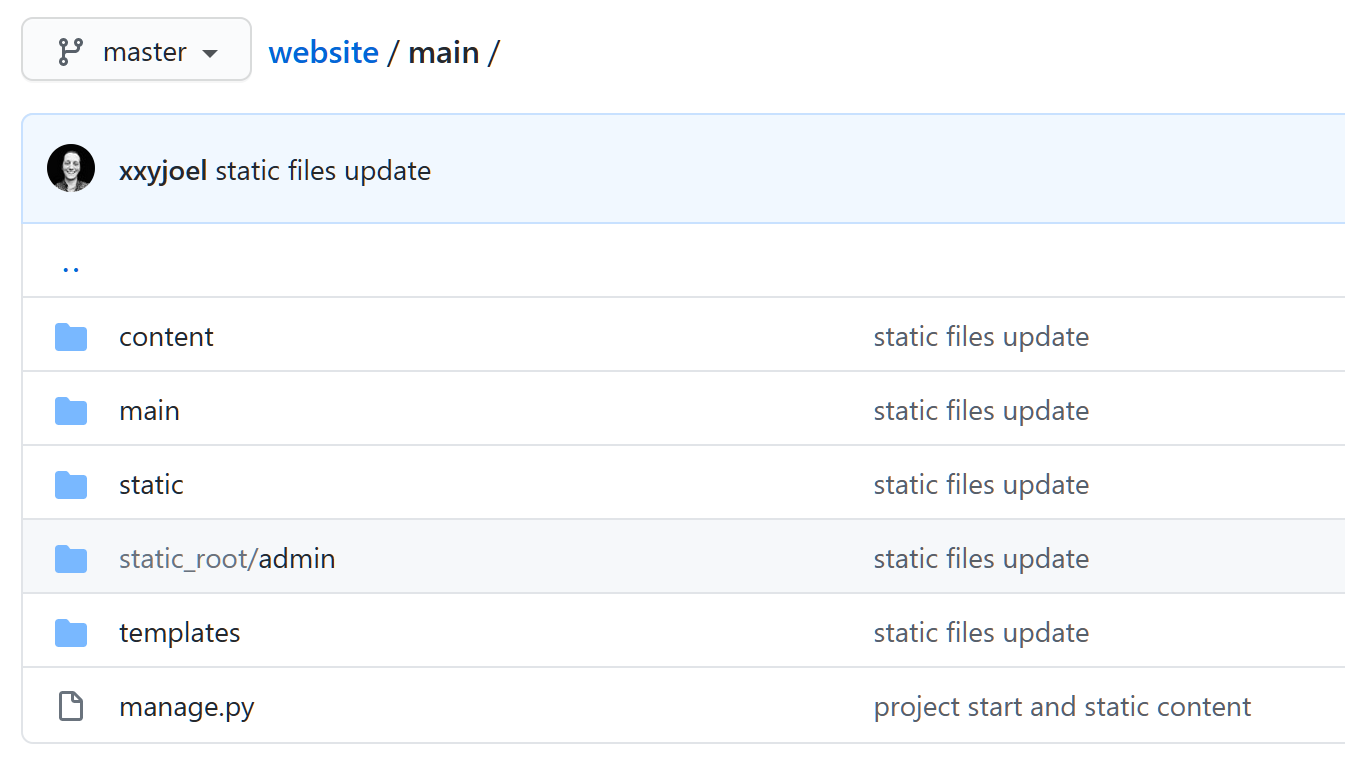
With the theme files stored in our static folder, our top level directory should look something like:
 Changes to the settings file include the addition of template directory, and static files directory location(s). Ensure installed apps are updated correctly as well.
STATIC_URL = '/static/'
STATICFILES_DIRS = [
    os.path.join(BASE_DIR, 'static'),
]
STATIC_ROOT = os.path.join(BASE_DIR, 'static_root')
When repurposing the templates assets (css, js, html, etc.) we need to (1) call
<curly brace><percent sign> load static <percent sign><curlet brace> # use symbols instead... odd liquid tag error prevented me from using in md
above the header and (2) locate the content and wrap it in
<curly brace><percent sign> static 'some stuff' <percent sign><curlet brace>
For example the following would go from
a class="navbar-brand" href="../index.html"
to
a class="navbar-brand" href="<curly brace><percent sign> static 'index.html' percent sign><curlet brace>"
note that we also had to remove the prefixed
../
from hrefs where we wanted static files pointed.
applied template:
NOTE: github pages does not seem to like much of the html-code-as-markdown, resulting in liquid tag errors… hence this post is not as verbose as originally desired